


Enjoy the new
payment experience
of FPS
With BOCHK Mobile Banking and
Internet Banking, you can conduct
interbank money transfers, pay bills and
receive payments instantly 24X7 in
real time wherever you are.
Internet Banking, you can conduct
interbank money transfers, pay bills and
receive payments instantly 24X7 in
real time wherever you are.
Registering FPS with HKID Number
will facilitate you to receive payments from
the HKSAR Government, institutions or corporates.
the HKSAR Government, institutions or corporates.


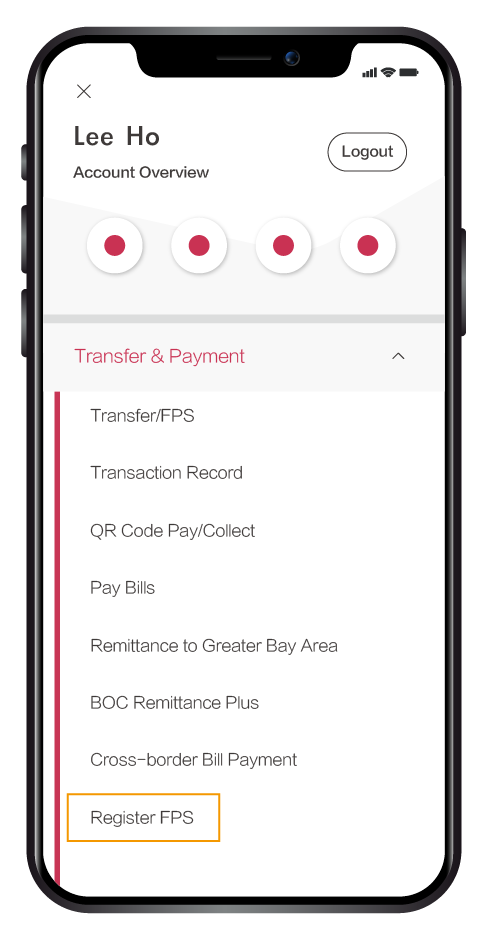
Register FPS

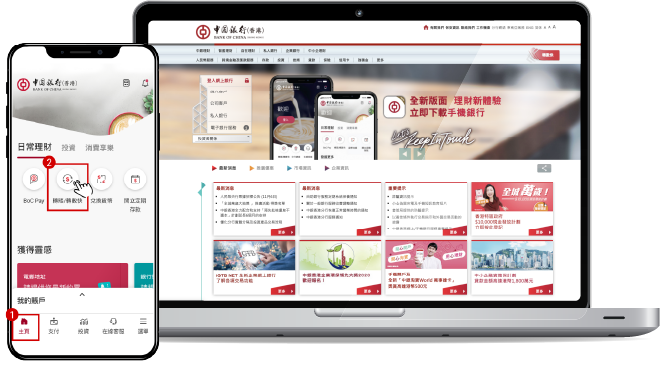
Register through
the below ways:
the below ways:
Mobile Banking |
 |
|
Internet Banking |
|
|
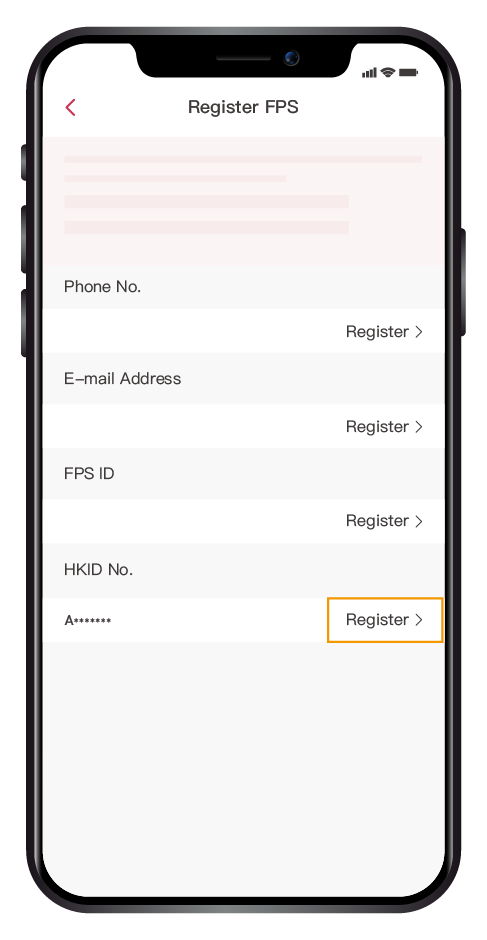
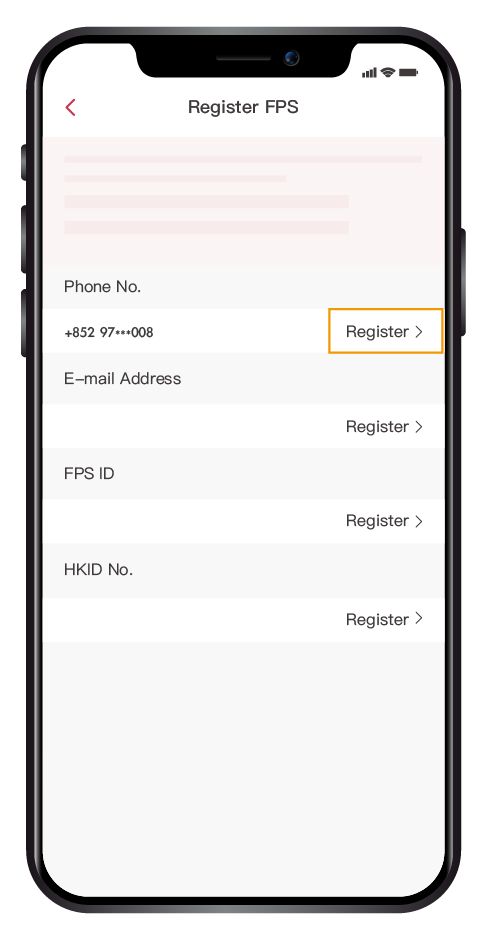
Simple Registration
Register with mobile number,
Email address and FPS ID
Email address and FPS ID
No Handling Fee
$0 Local inter-bank
transfer fee
transfer fee
HKID Number Binding
Receive payment and transfer
from the HKSAR government,
institutions or corporates*
from the HKSAR government,
institutions or corporates*
*Registering your HKID number as Proxy ID
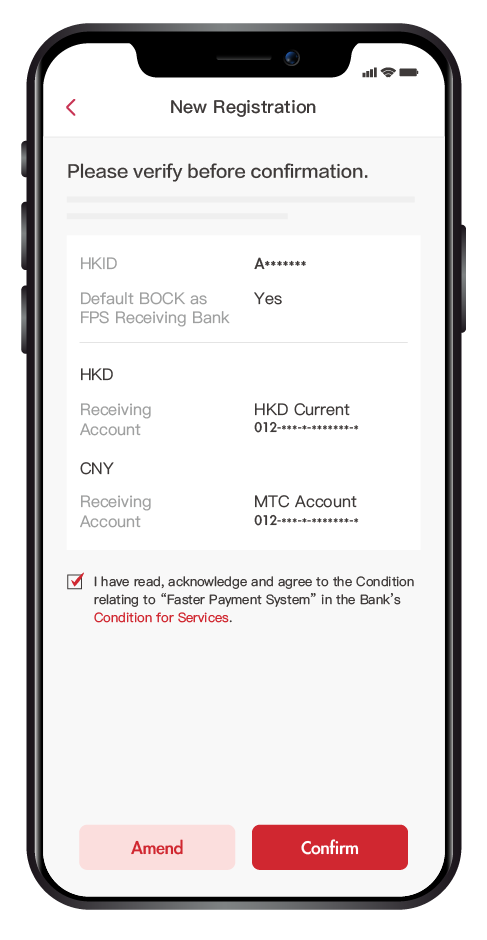
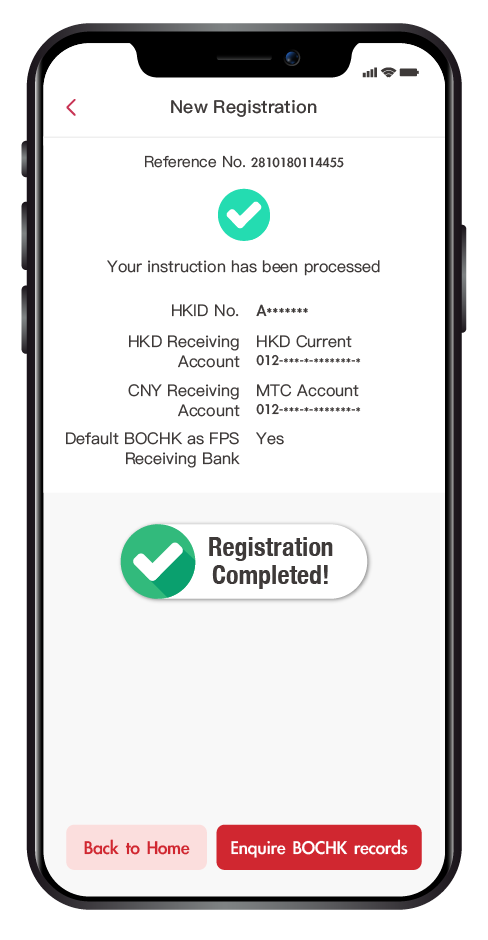
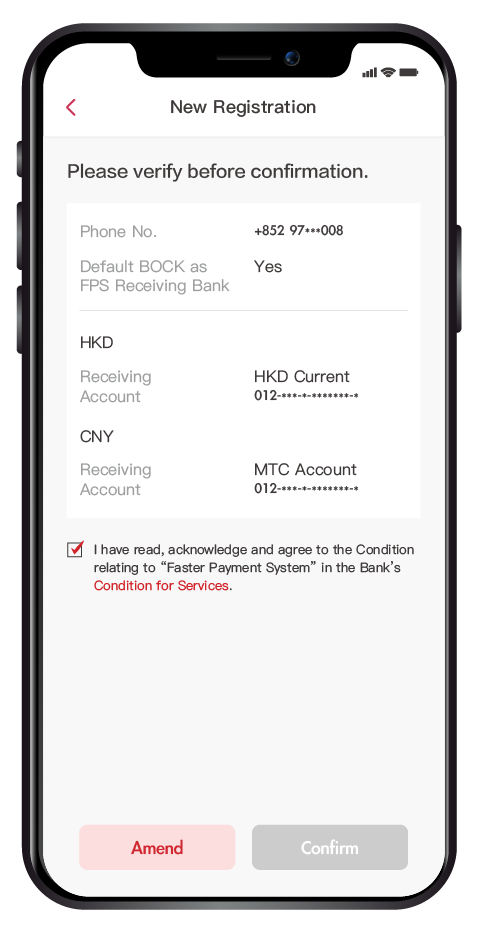
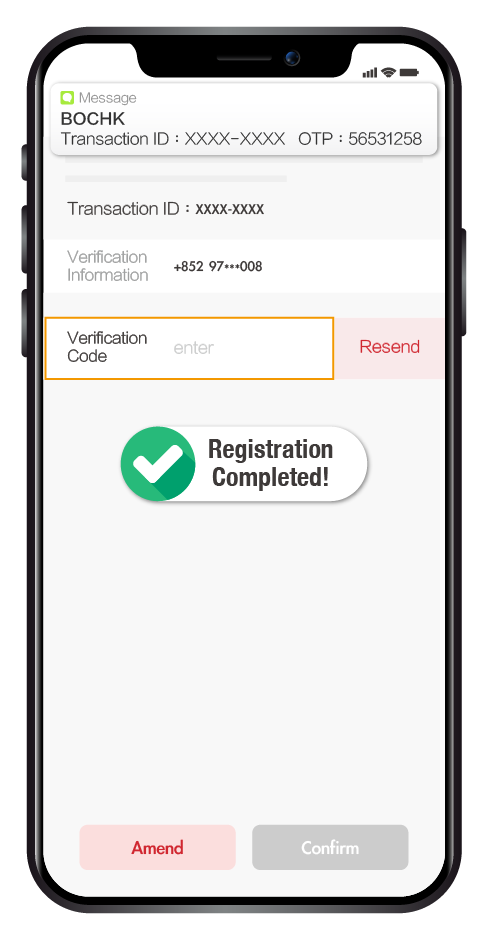
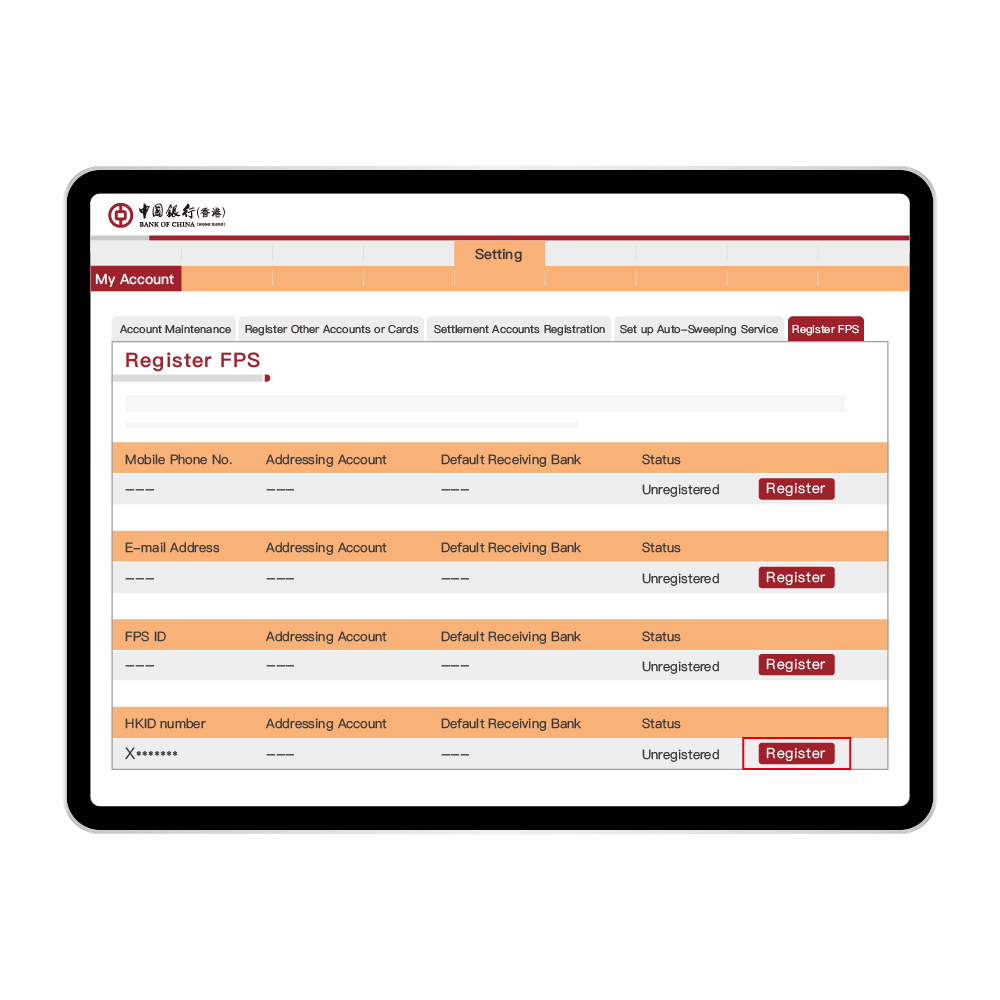
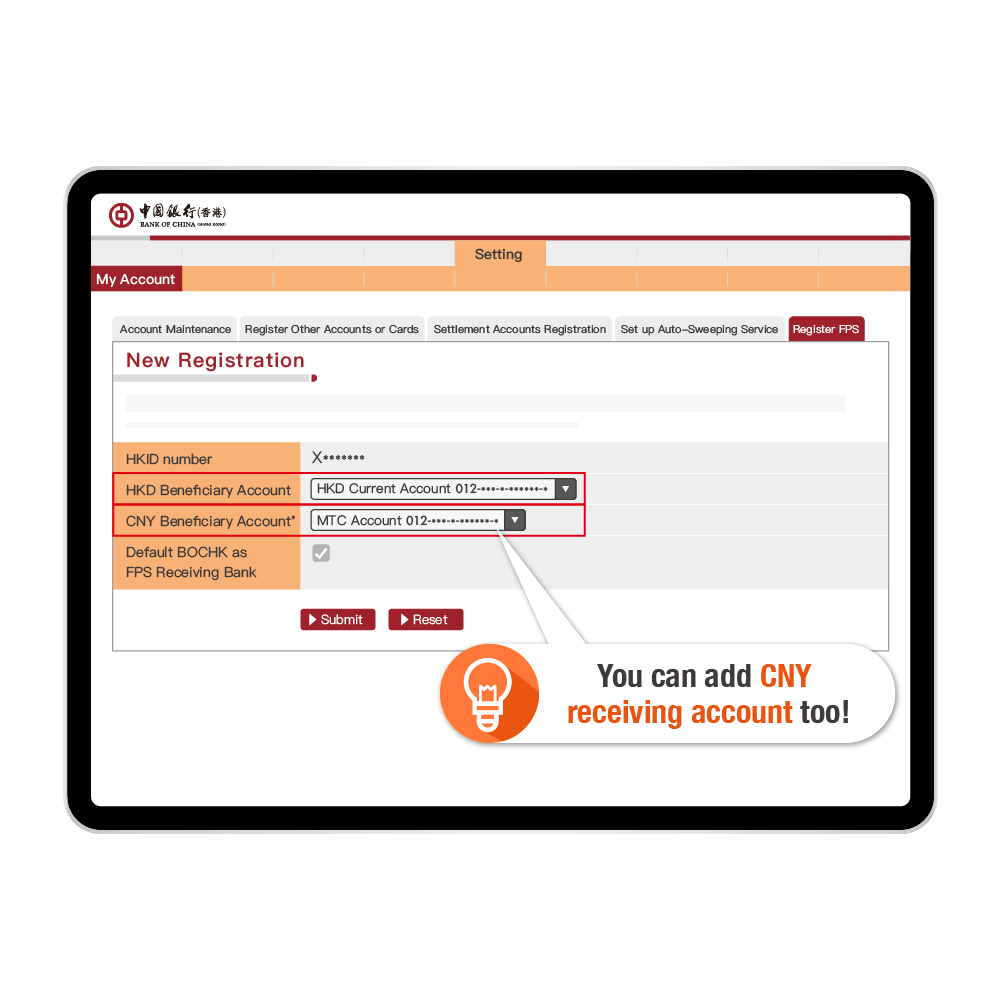
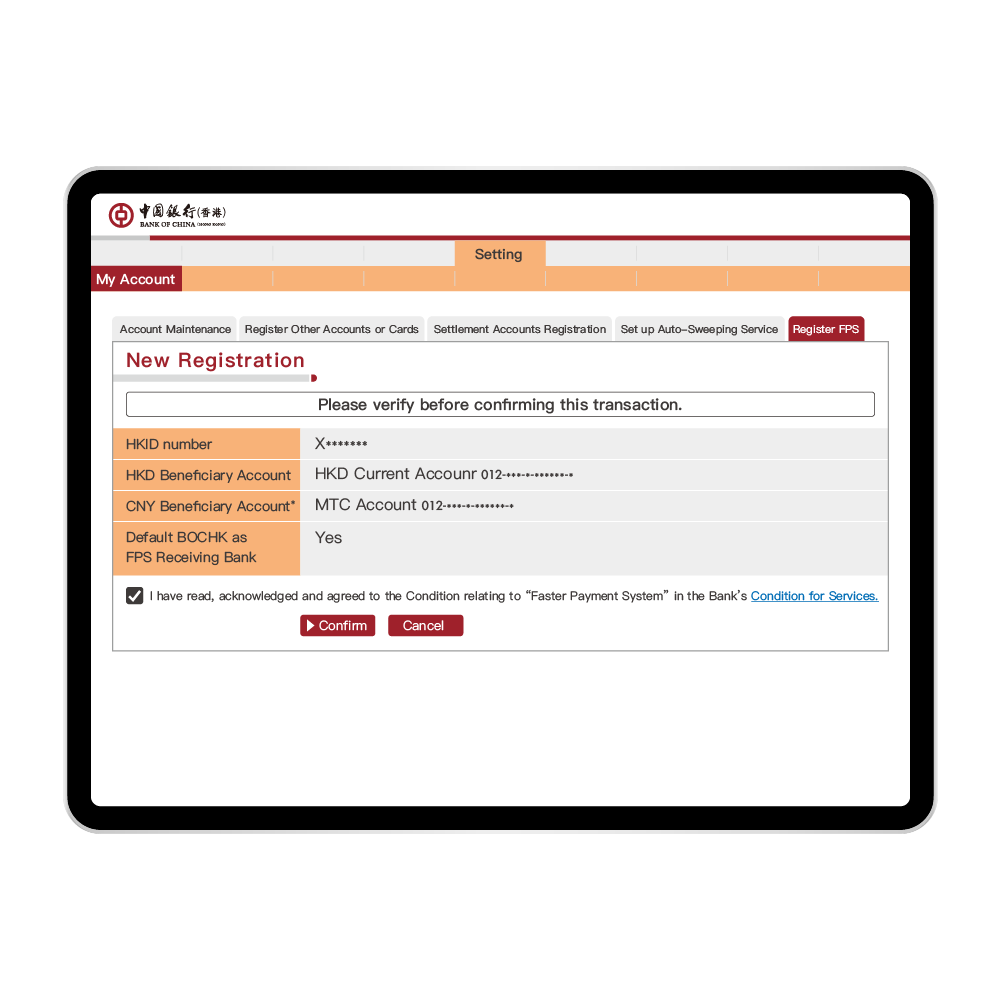
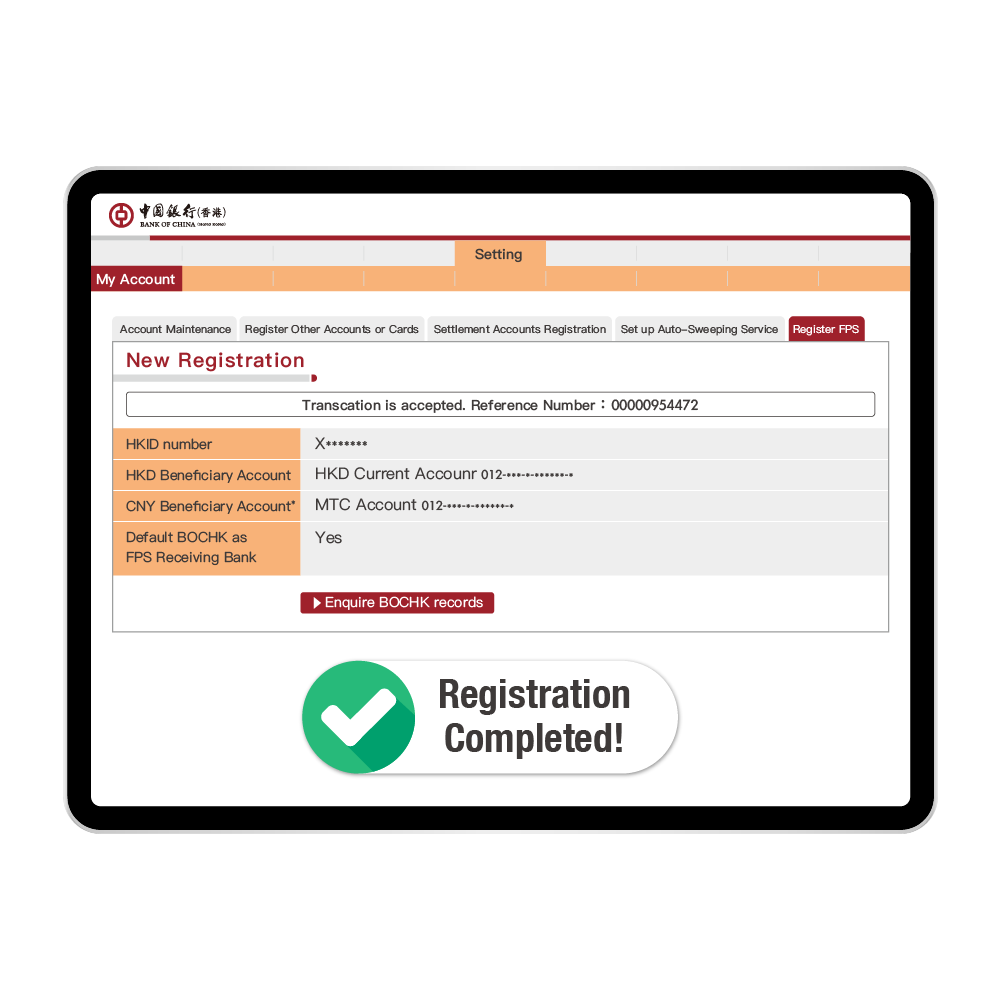
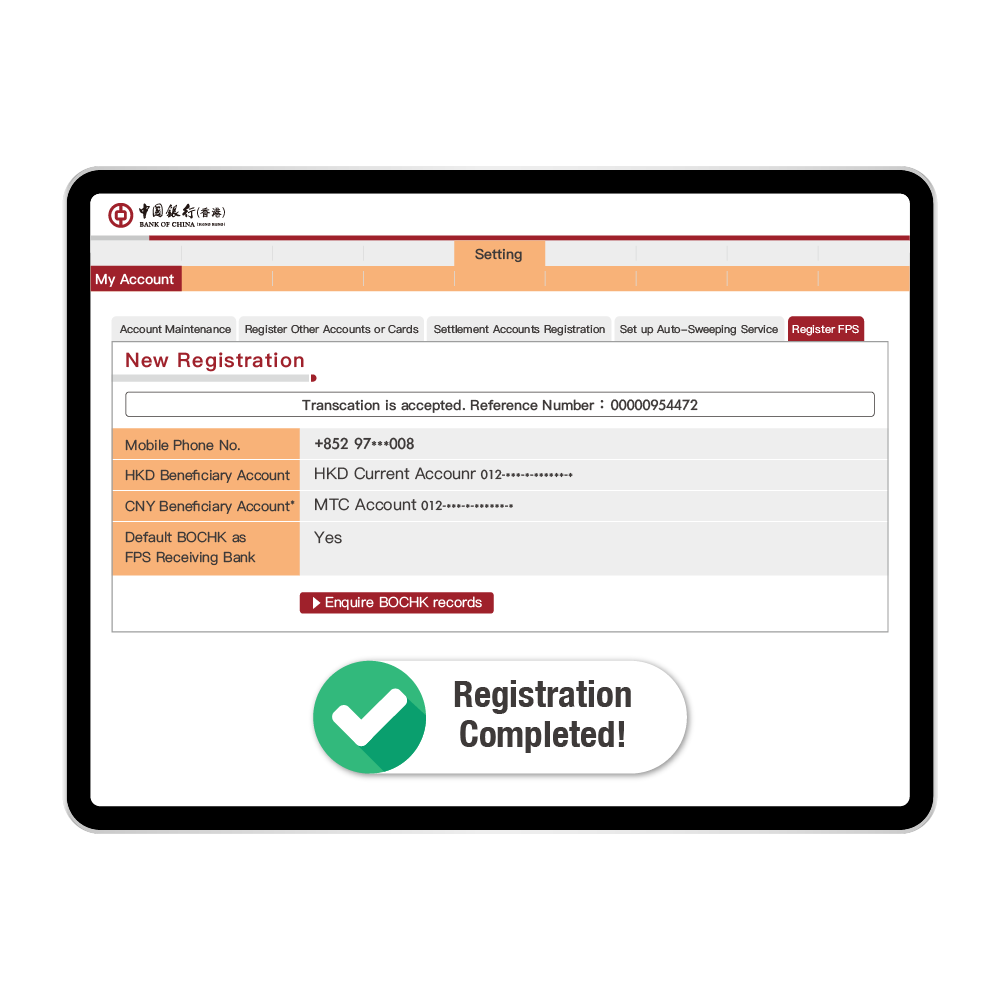
Register with HKID Number
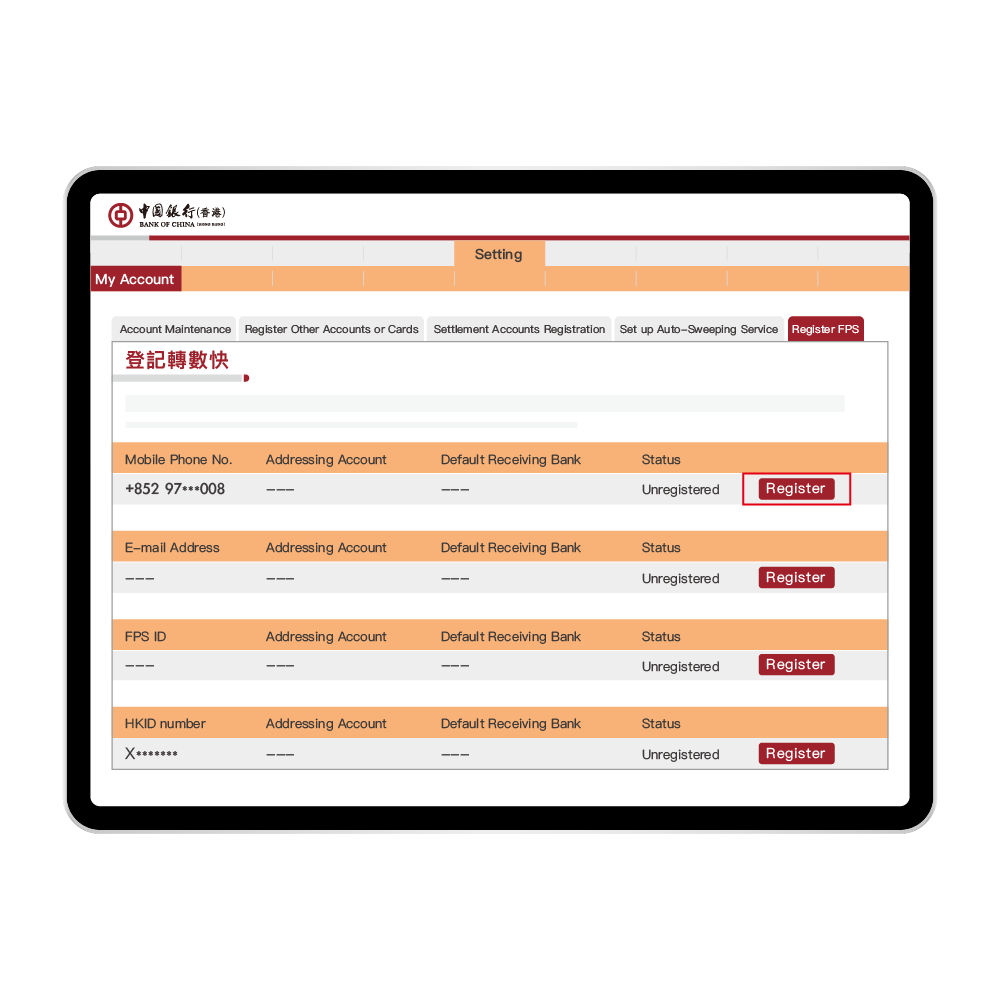
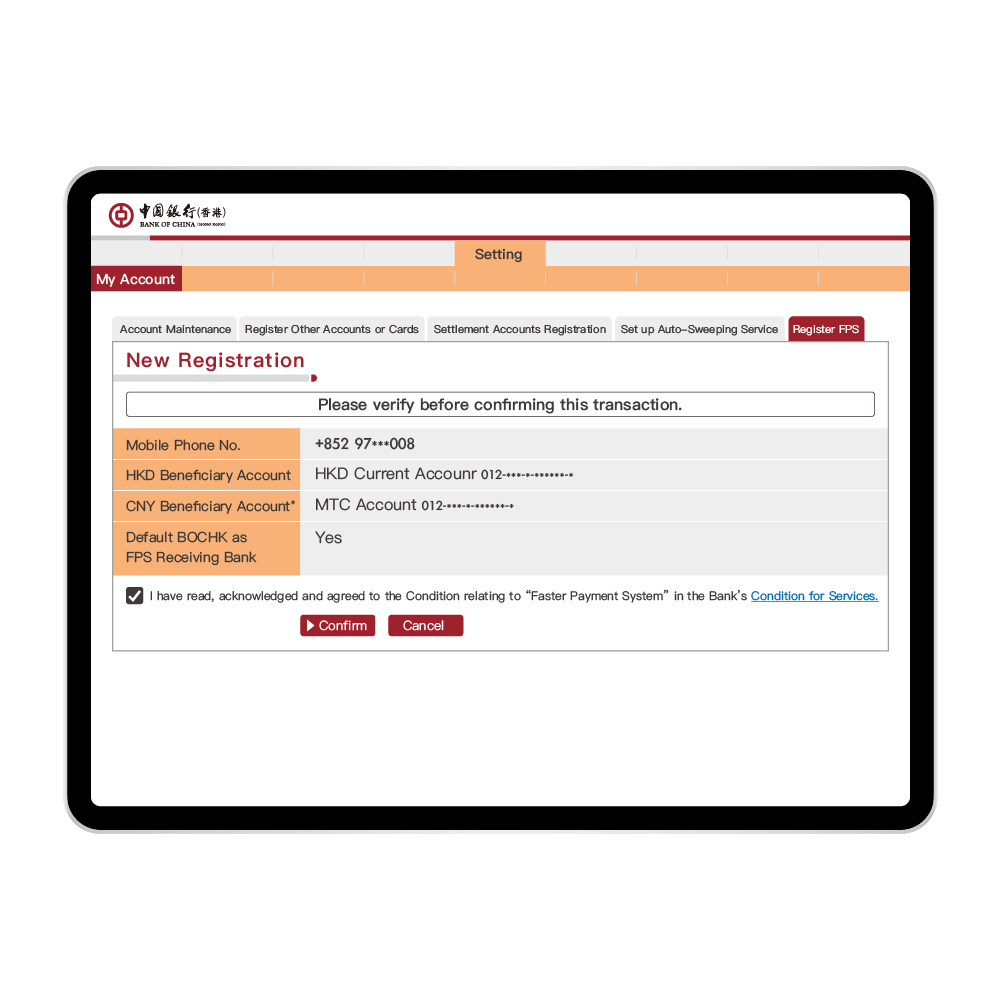
Register with Mobile Number


Real-time
Interbank Transfer
Interbank Transfer
|
|
Interbank Realtime
Connect to different banks and
eWallets
eWallets
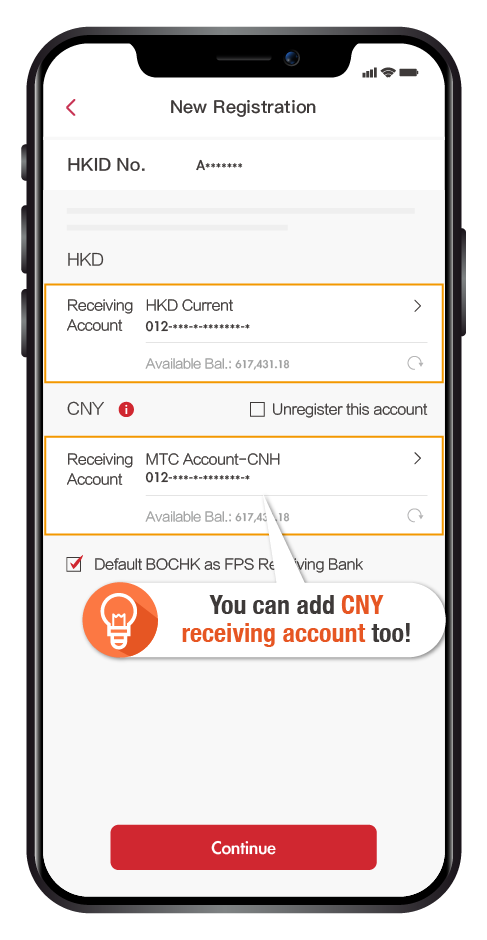
Multiple Currencies
Hong Kong dollar (HKD)
and Renminbi (RMB)
and Renminbi (RMB)
Flexibility
Daily transfer amount
up to HK$3M
up to HK$3M
Transfer
Merchant & Bill Payments


Pay and Receive by
FPS QR Code
FPS QR Code
Speedy Experience
Pay and Receive by
QR Code
QR Code
Merchant & Bill Payments
Government, merchants,
institutions and utility bills.
institutions and utility bills.
24/7 Round the clock
Receive funds, transfer,
pay bills in seconds
pay bills in seconds
QR Code Transfer
QR Code Payment
QR Code Collect
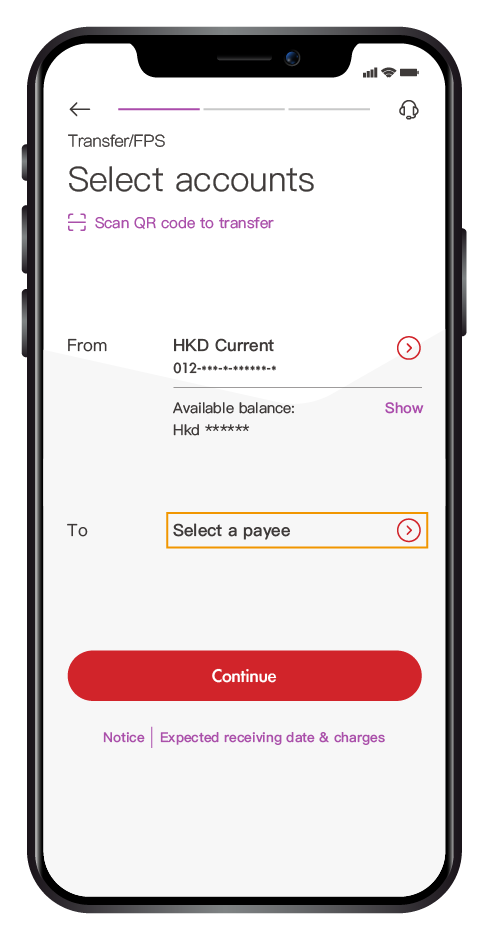
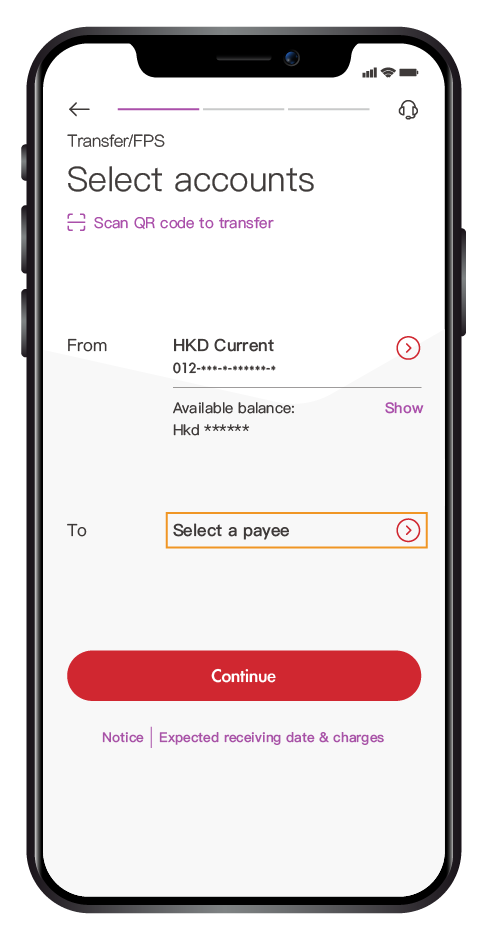
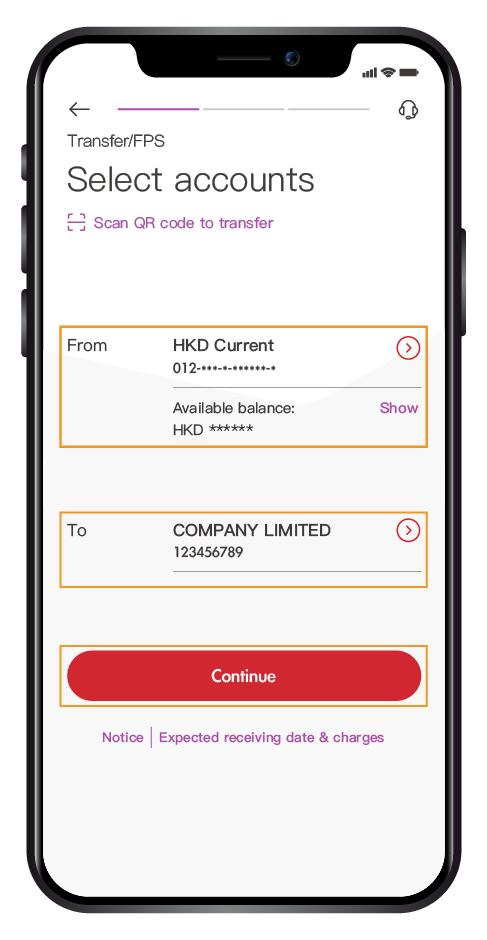
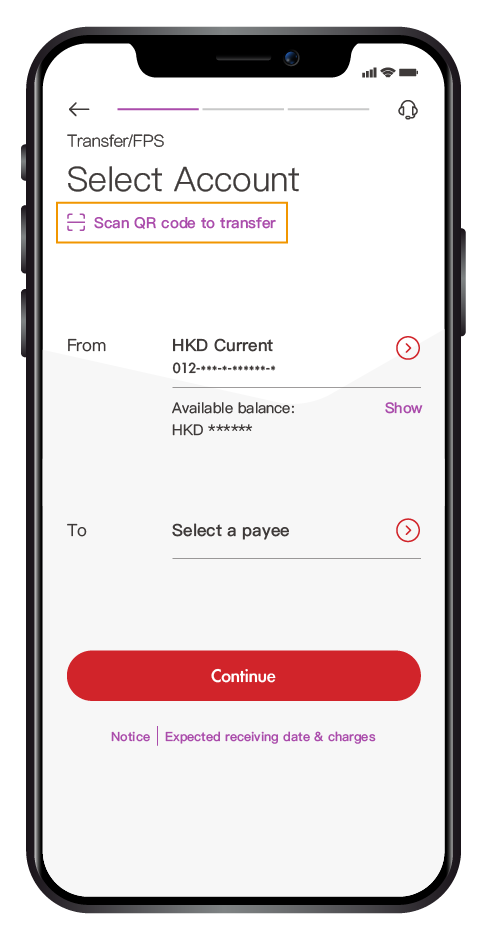
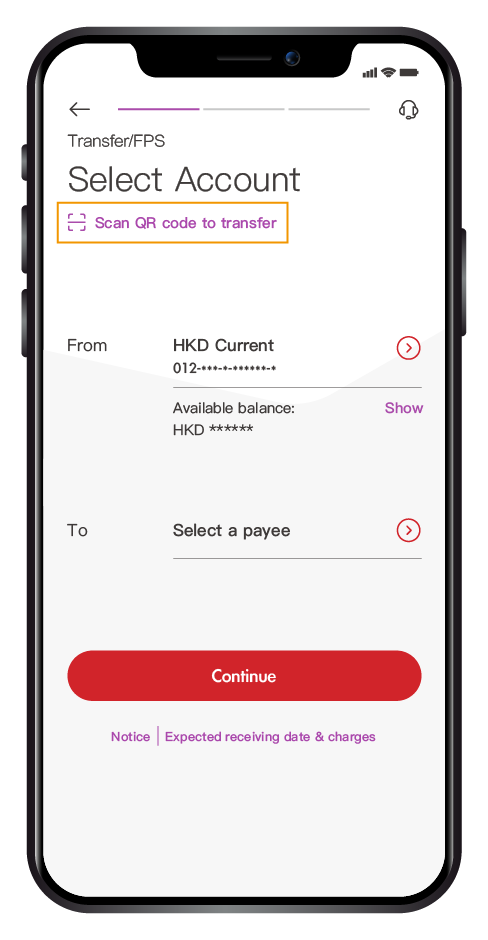
Select "Transfer/FPS" under "Manage" after login,
➤ "Scan QR code to transfer
➤ "Scan QR code to transfer
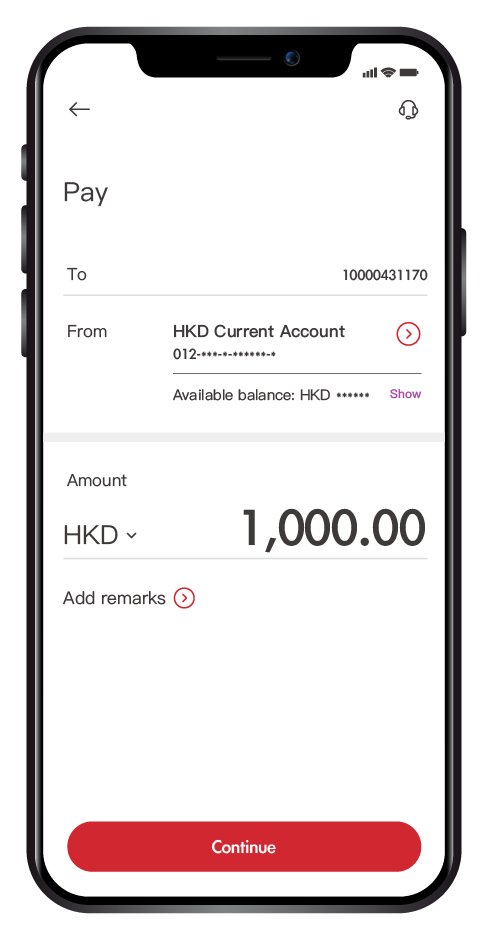
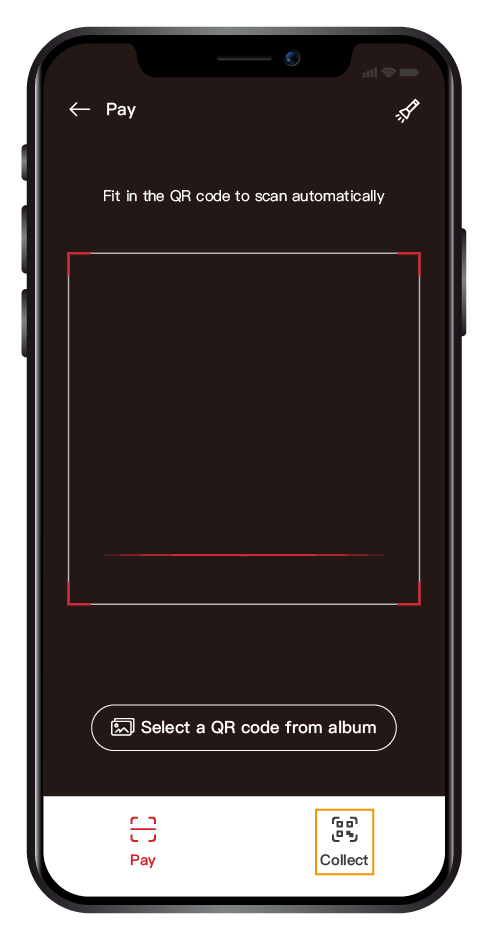
Scan the QR code or select the QR code from phone album.
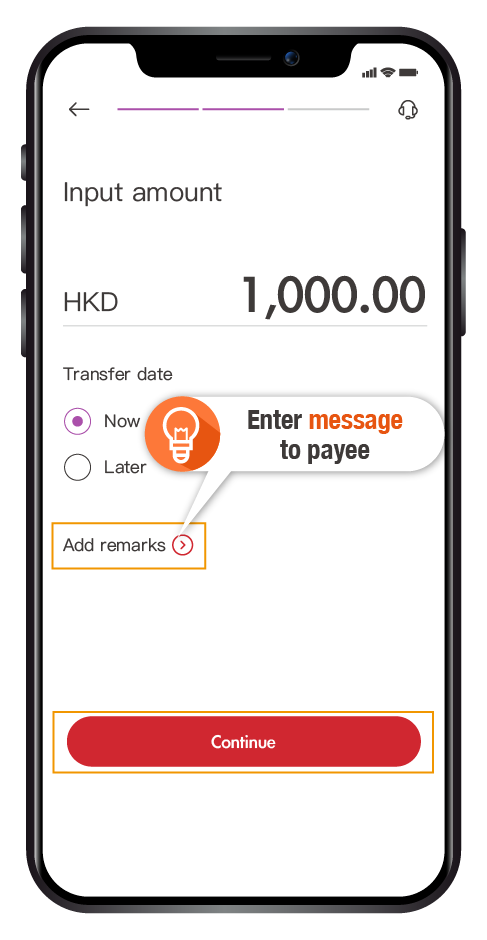
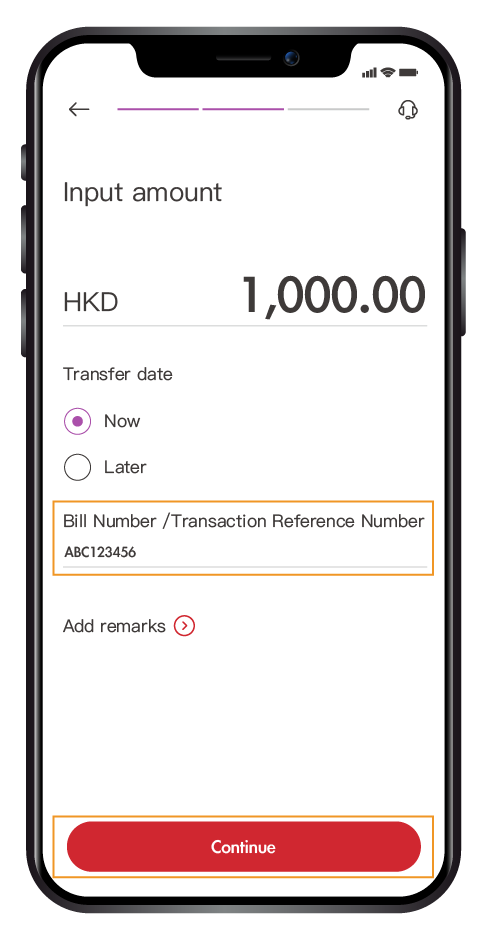
Enter transfer amount (if the payee didn’t specify the amount in the QR code).
Remarks: If necessary, you may also change the From account on this page.
Remarks: If necessary, you may also change the From account on this page.
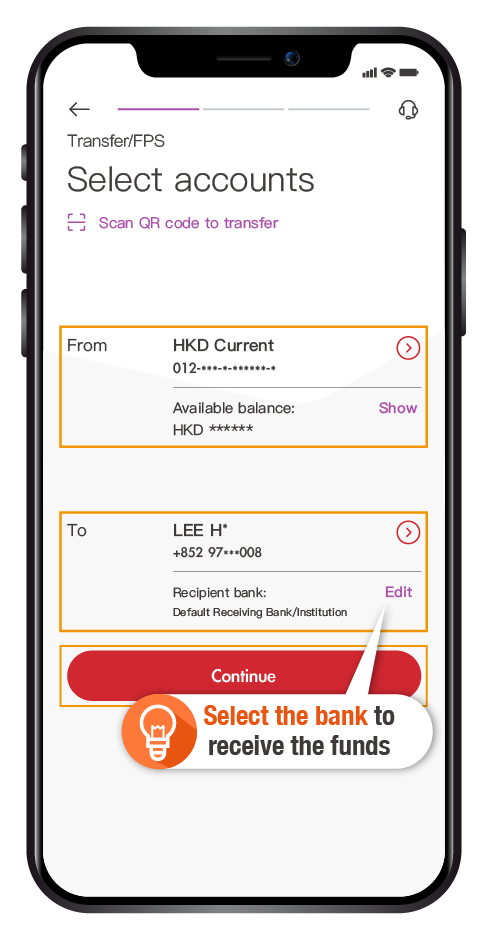
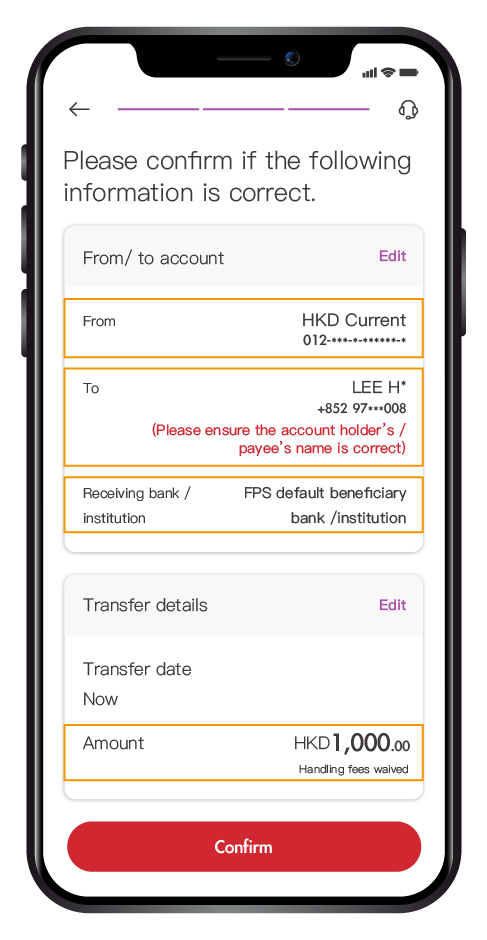
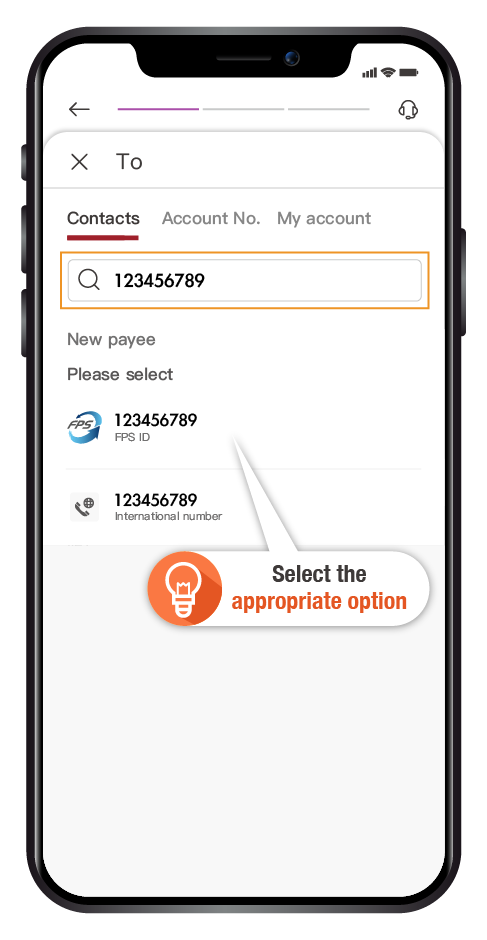
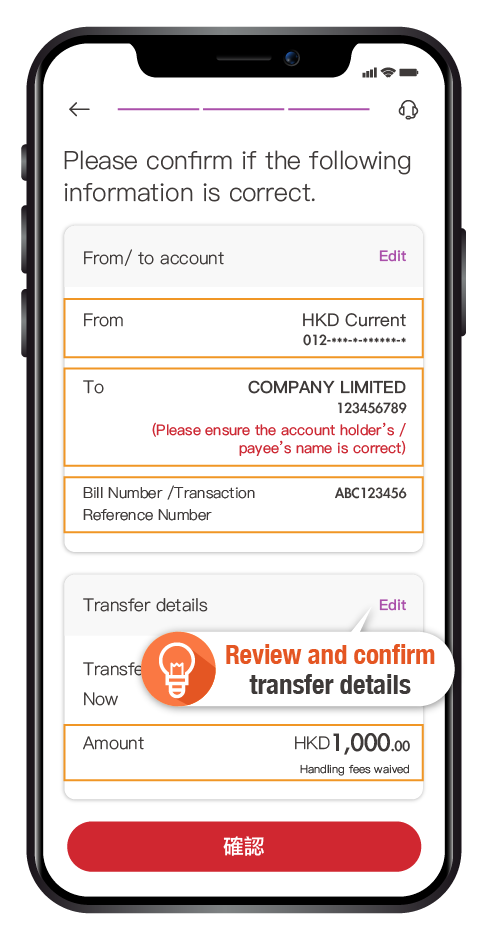
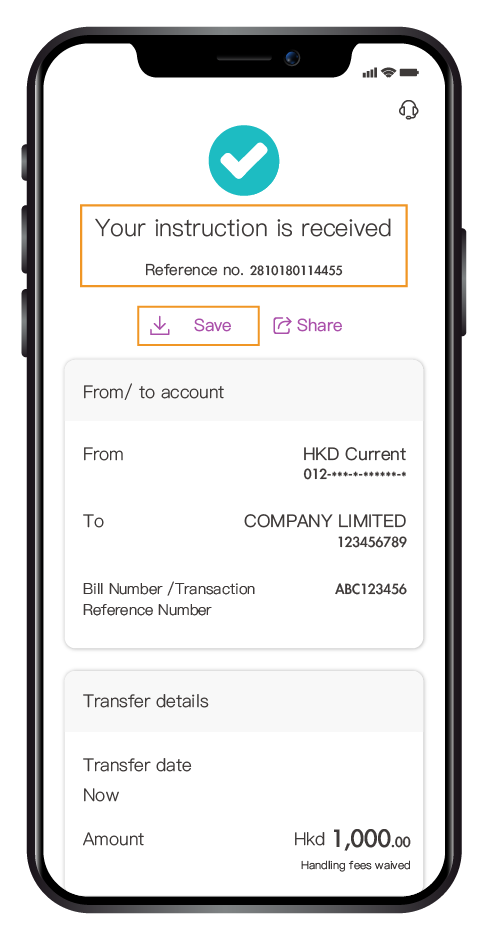
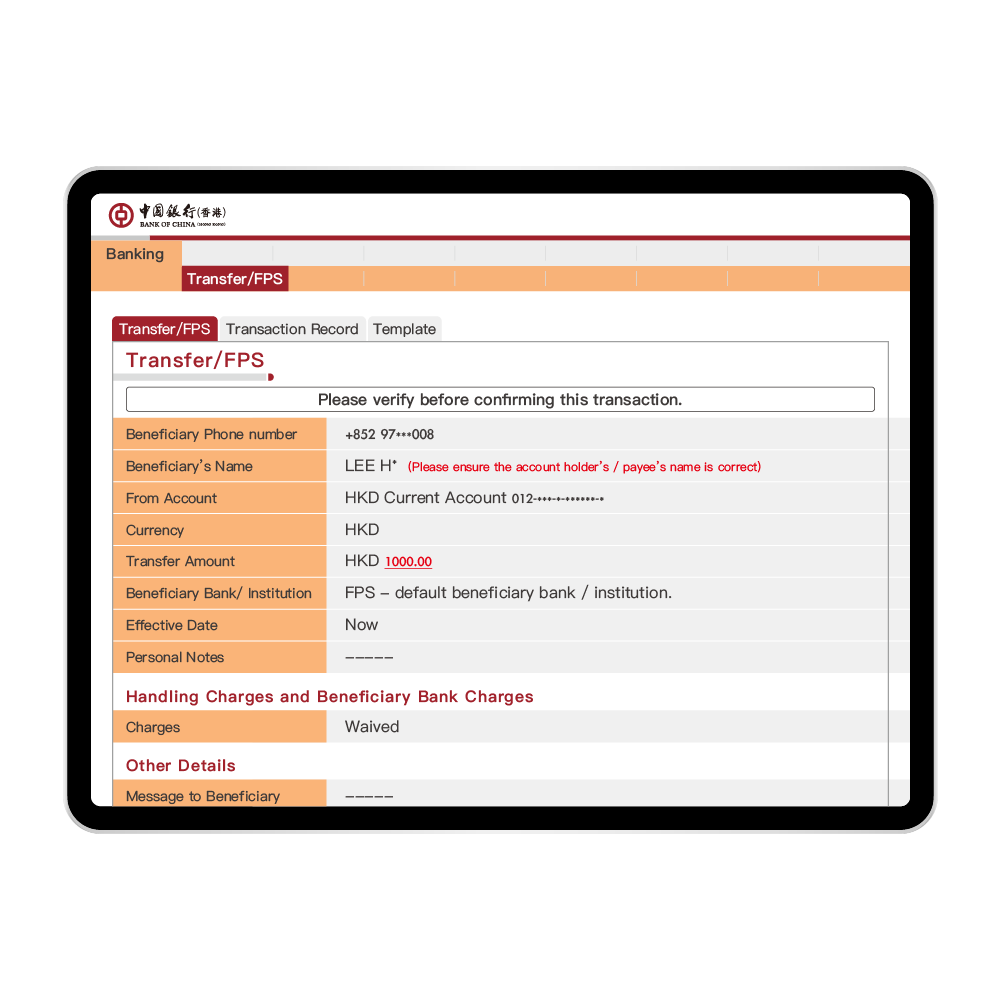
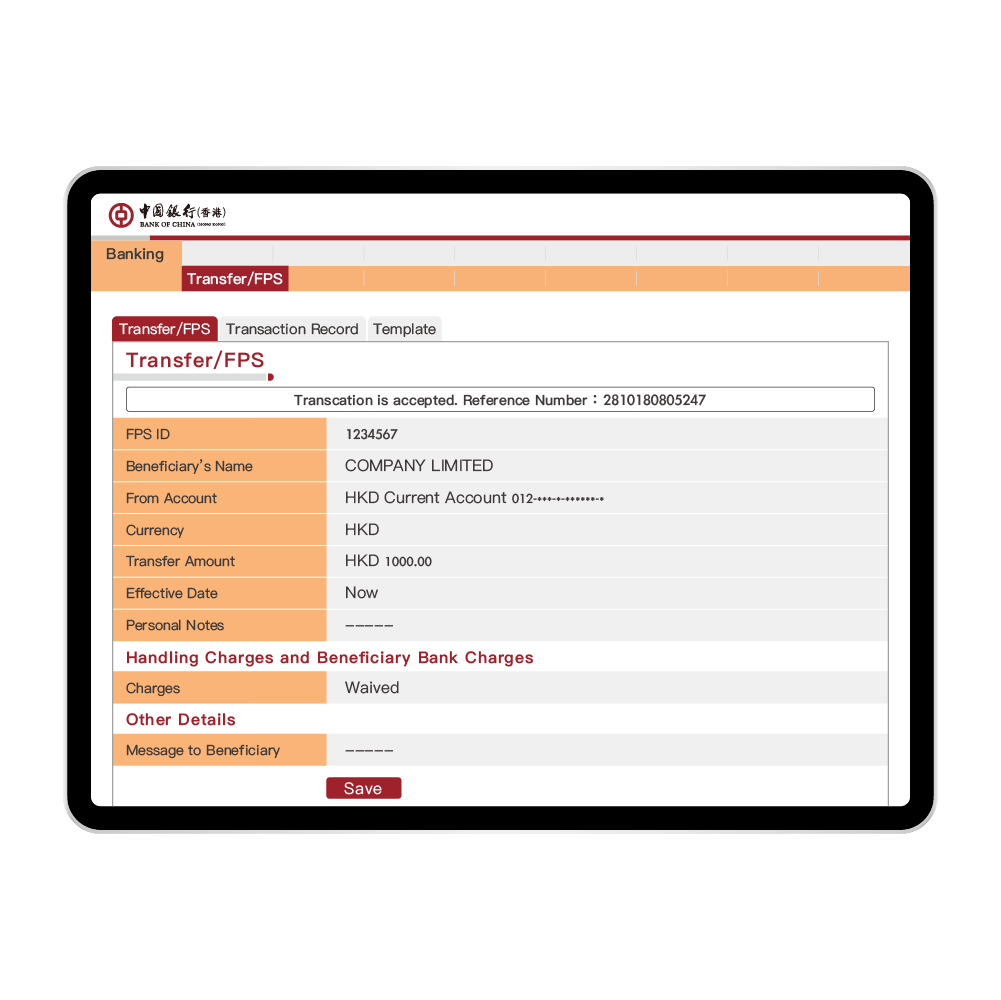
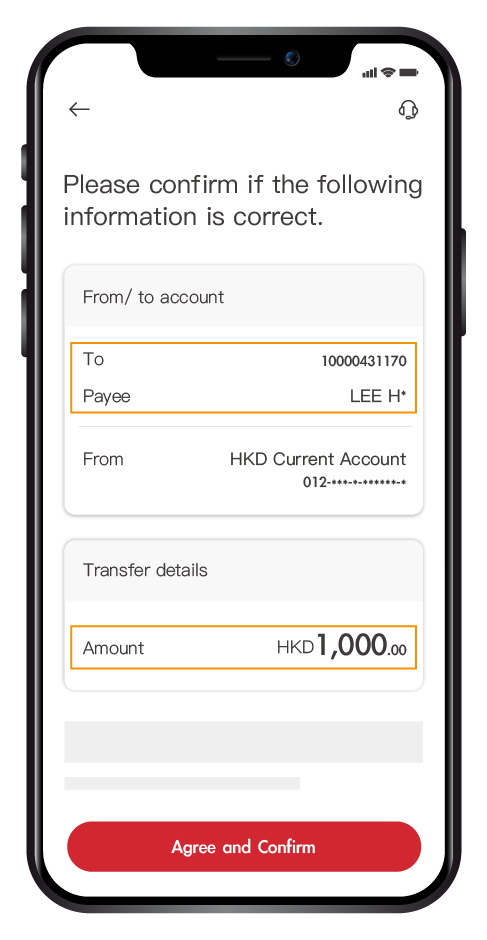
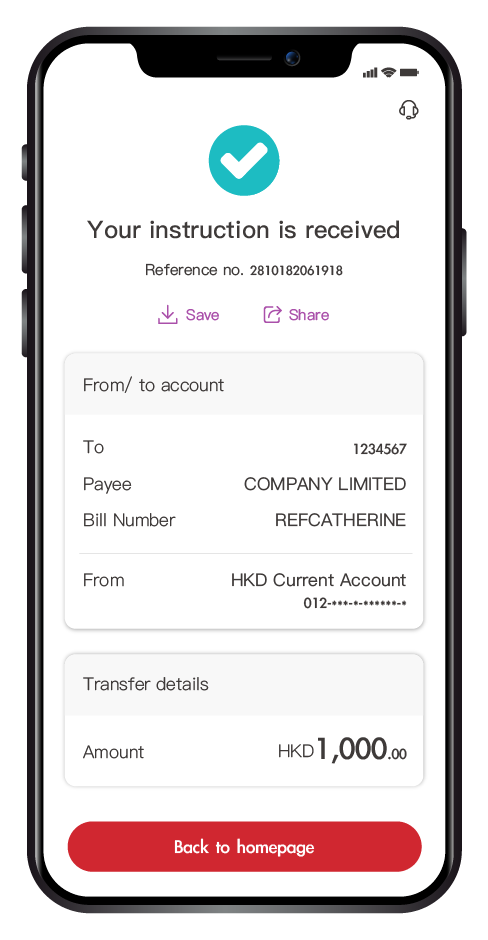
Review payee information and confirm transfer details.
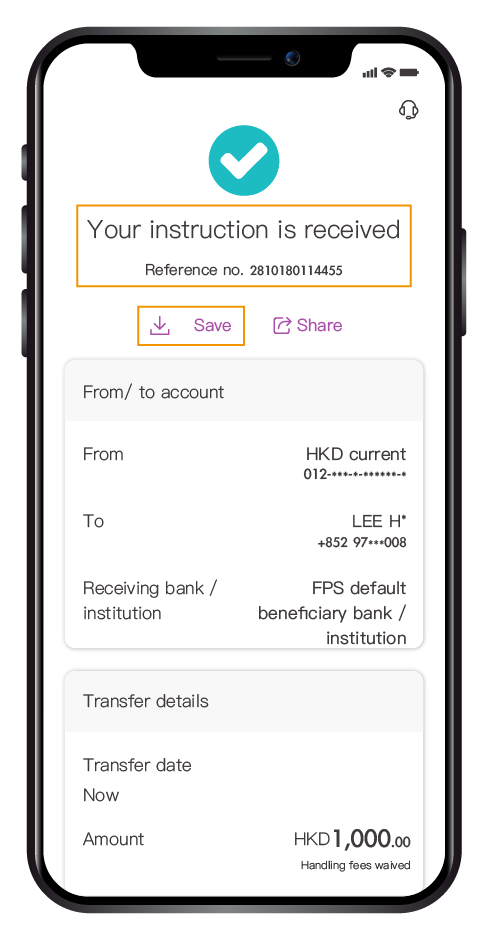
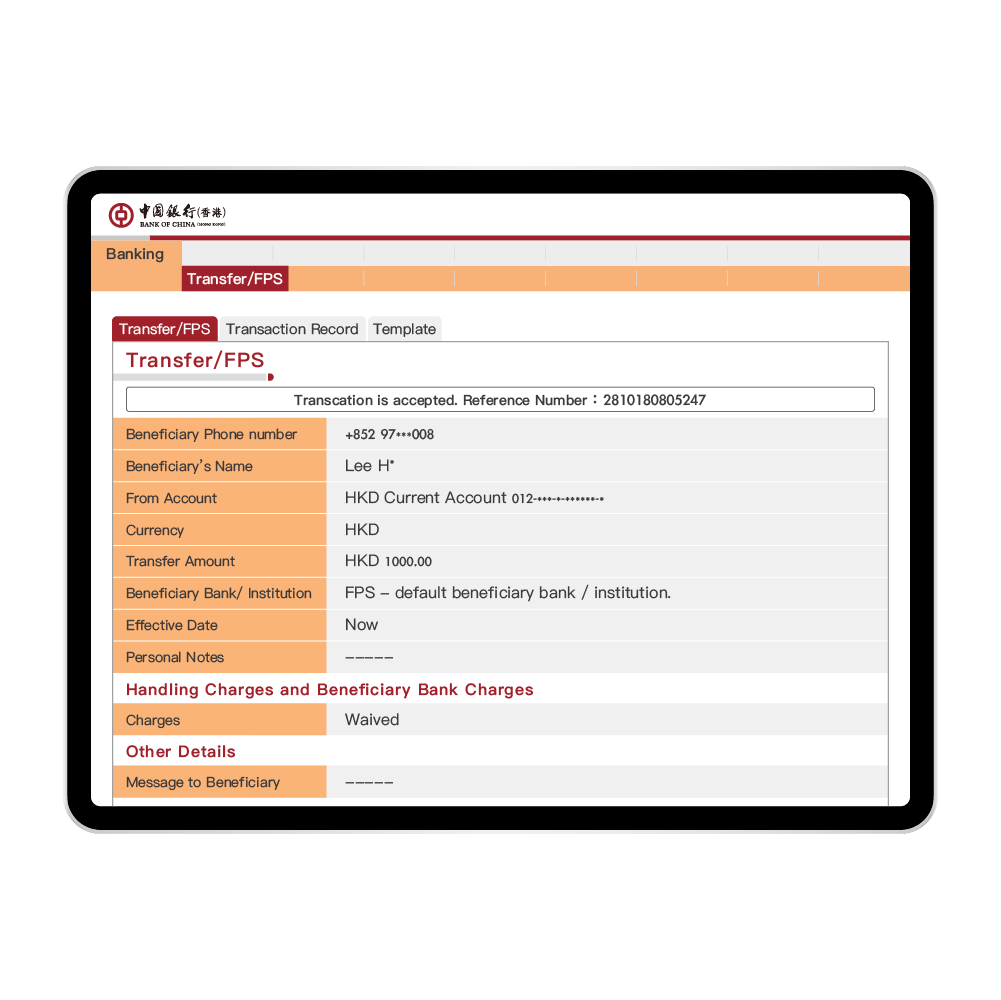
Transfer done!


Select "Transfer/FPS" under "Manage" after login, ➤ "Scan QR code to transfer
Scan the QR code or select the QR code from phone album.
Enter transfer amount (if the payee didn’t specify the amount in the QR code).
Remarks: If necessary, you may also change the From account on this page.
Remarks: If necessary, you may also change the From account on this page.

Review payee information and confirm transfer details.

Transfer done!


Select "Transfer/FPS" under "Manage" after login,
➤ "Scan QR code to transfer"
➤ "Scan QR code to transfer"
Scan the QR code or select the QR code from phone album.
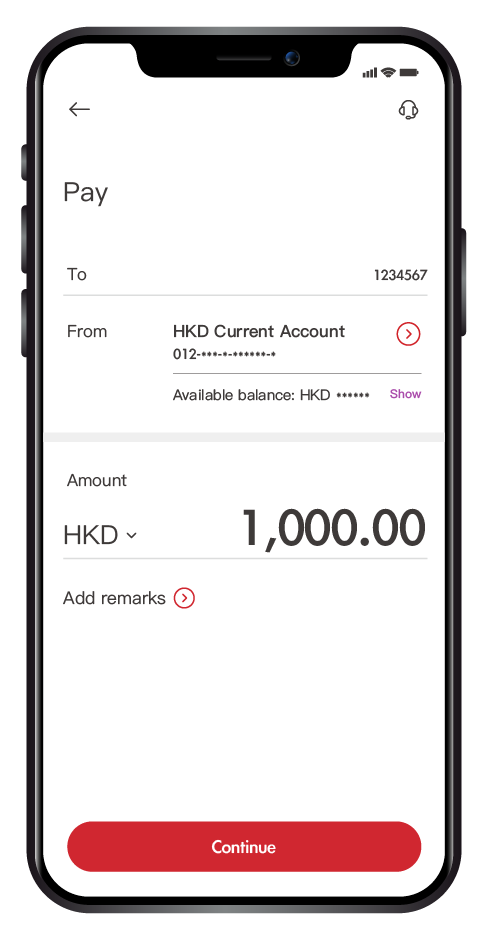
Enter transfer amount (if the payee didn’t specify the amount in the QR code).
Remarks: If necessary, you may also change the From account on this page.
Remarks: If necessary, you may also change the From account on this page.
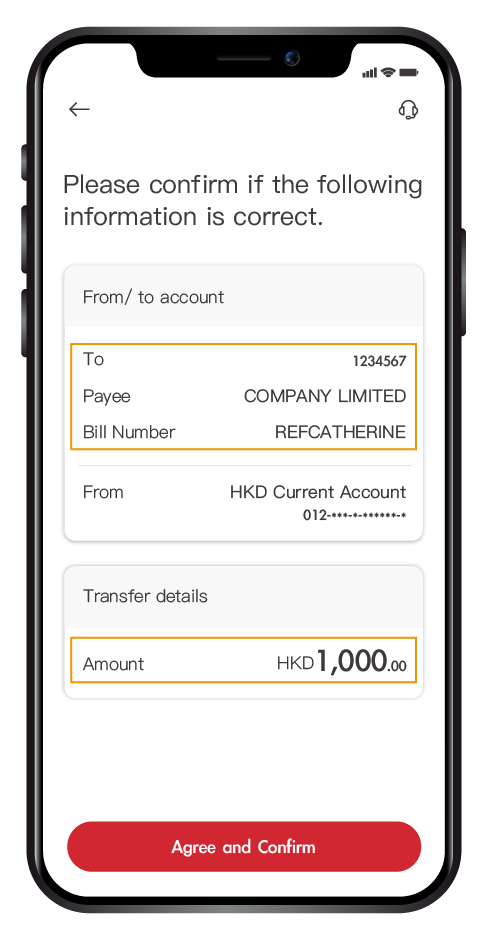
Review payee information and confirm transfer details.
Remarks: Bill number or transaction reference number is only applicable to merchant payments.
Remarks: Bill number or transaction reference number is only applicable to merchant payments.
Transfer done!
Select "Transfer/FPS" under "Manage" after login, ➤ "Scan QR code to transfer"
Scan the QR code or select the QR code from phone album.
Enter transfer amount (if the payee didn’t specify the amount in the QR code).
Remarks: If necessary, you may also change the From account on this page.
Remarks: If necessary, you may also change the From account on this page.
Review payee information and confirm transfer details.
Remarks: Bill number or transaction reference number is only applicable to merchant payments.
Remarks: Bill number or transaction reference number is only applicable to merchant payments.
Transfer done!


Select "Transfer/FPS" under "Manage" after login,
➤ "Scan QR code to transfer"
➤ "Scan QR code to transfer"
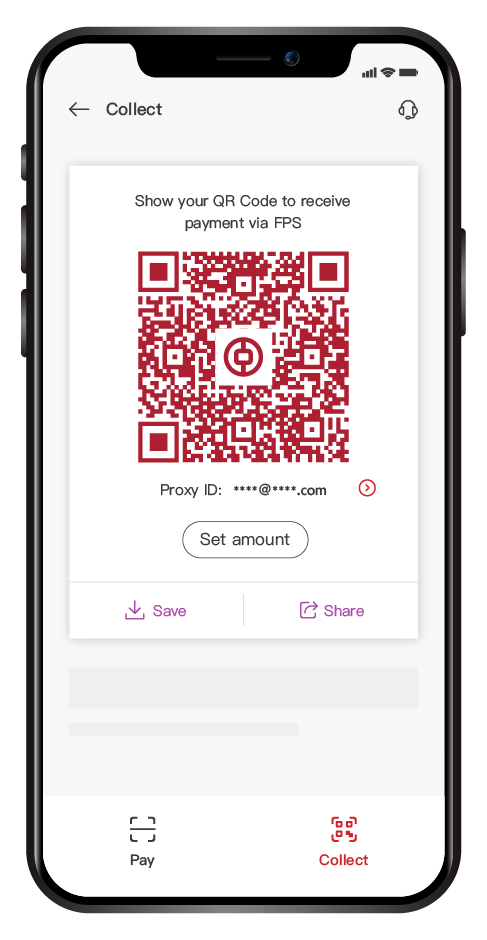
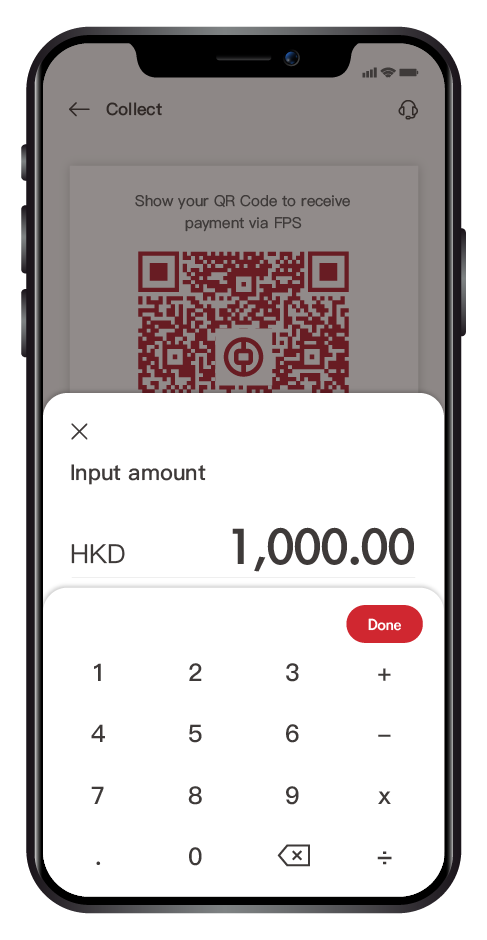
Select "Collect".
Show your QR Code to receive payment via FPS!
Remarks: To check how to specify a collection amount (optional), see step 4. To check how to change the Proxy ID, see step 5.
Remarks: To check how to specify a collection amount (optional), see step 4. To check how to change the Proxy ID, see step 5.
On "Collect" page you may specify the amount to collect by selecting "Set amount" (optional).
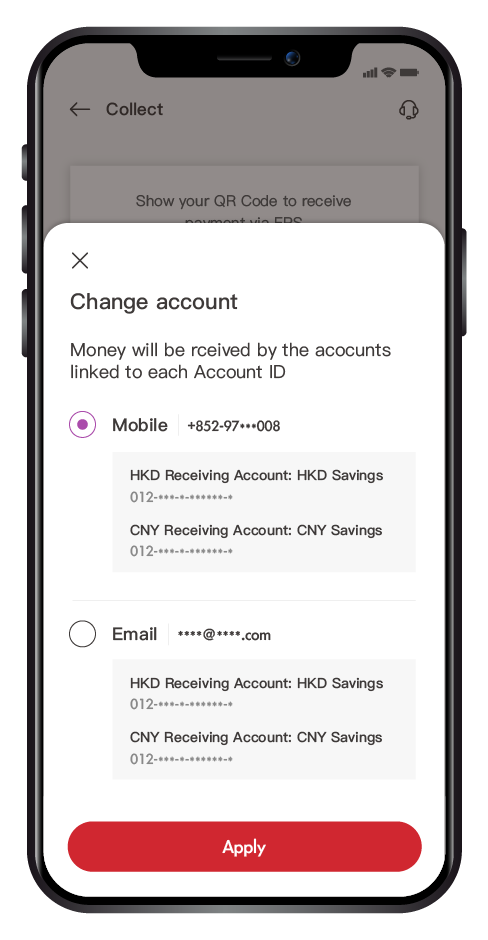
On "Collect" page you may change the Proxy ID by selecting the arrow icon in red below the QR code (if necessary).
Remarks: Money will be received by the,
bank account linked to the chosen Proxy ID.
Remarks: Money will be received by the,
bank account linked to the chosen Proxy ID.
Select "Transfer/FPS" under "Manage" after login, ➤ "Scan QR code to transfer"
Select "Collect".
Show your QR Code to receive payment via FPS!
Remarks: To check how to specify a collection amount (optional), see step 4. To check how to change the Proxy ID, see step 5.
Remarks: To check how to specify a collection amount (optional), see step 4. To check how to change the Proxy ID, see step 5.
On "Collect" page you may specify the amount to collect by selecting "Set amount" (optional).
On "Collect" page you may change the Proxy ID by selecting the arrow icon in red below the QR code (if necessary).
Remarks: Money will be received by the bank account linked to the chosen Proxy ID.
Remarks: Money will be received by the bank account linked to the chosen Proxy ID.

General Terms:
- Customers are responsible for the data charges incurred by using/downloading BOCHK Mobile Application or Mobile Banking.
- Please download mobile applications from official application stores or BOCHK website, and ensure the search wording is correct. iPhone or iPad users may download BOCHK Mobile Applications via App Store; Android users may download BOCHK Mobile Applications via Google Play, and Huawei AppGallery or BOCHK website.
- The above products, services and offers are subject to the relevant terms and conditions. For details, please contact the staff of Bank of China (Hong Kong) Limited (“the Bank”).
- BOCHK reserves the right to amend, suspend and terminate the above products and services and to amend the relevant terms at any time at its sole discretion.
- In case of any dispute, the decision of BOCHK shall be final.
- Should there be any discrepancy between the English and Chinese versions of this promotion material, the Chinese version shall prevail.
